10
How to update your Metal Blockchain node name
In this chapter, you’ll learn how to update your node name so that it becomes visible on the Metal Blockchain Explorer and wallets.
Step 1: Explore the validator’s page on the block explorer by clicking here.
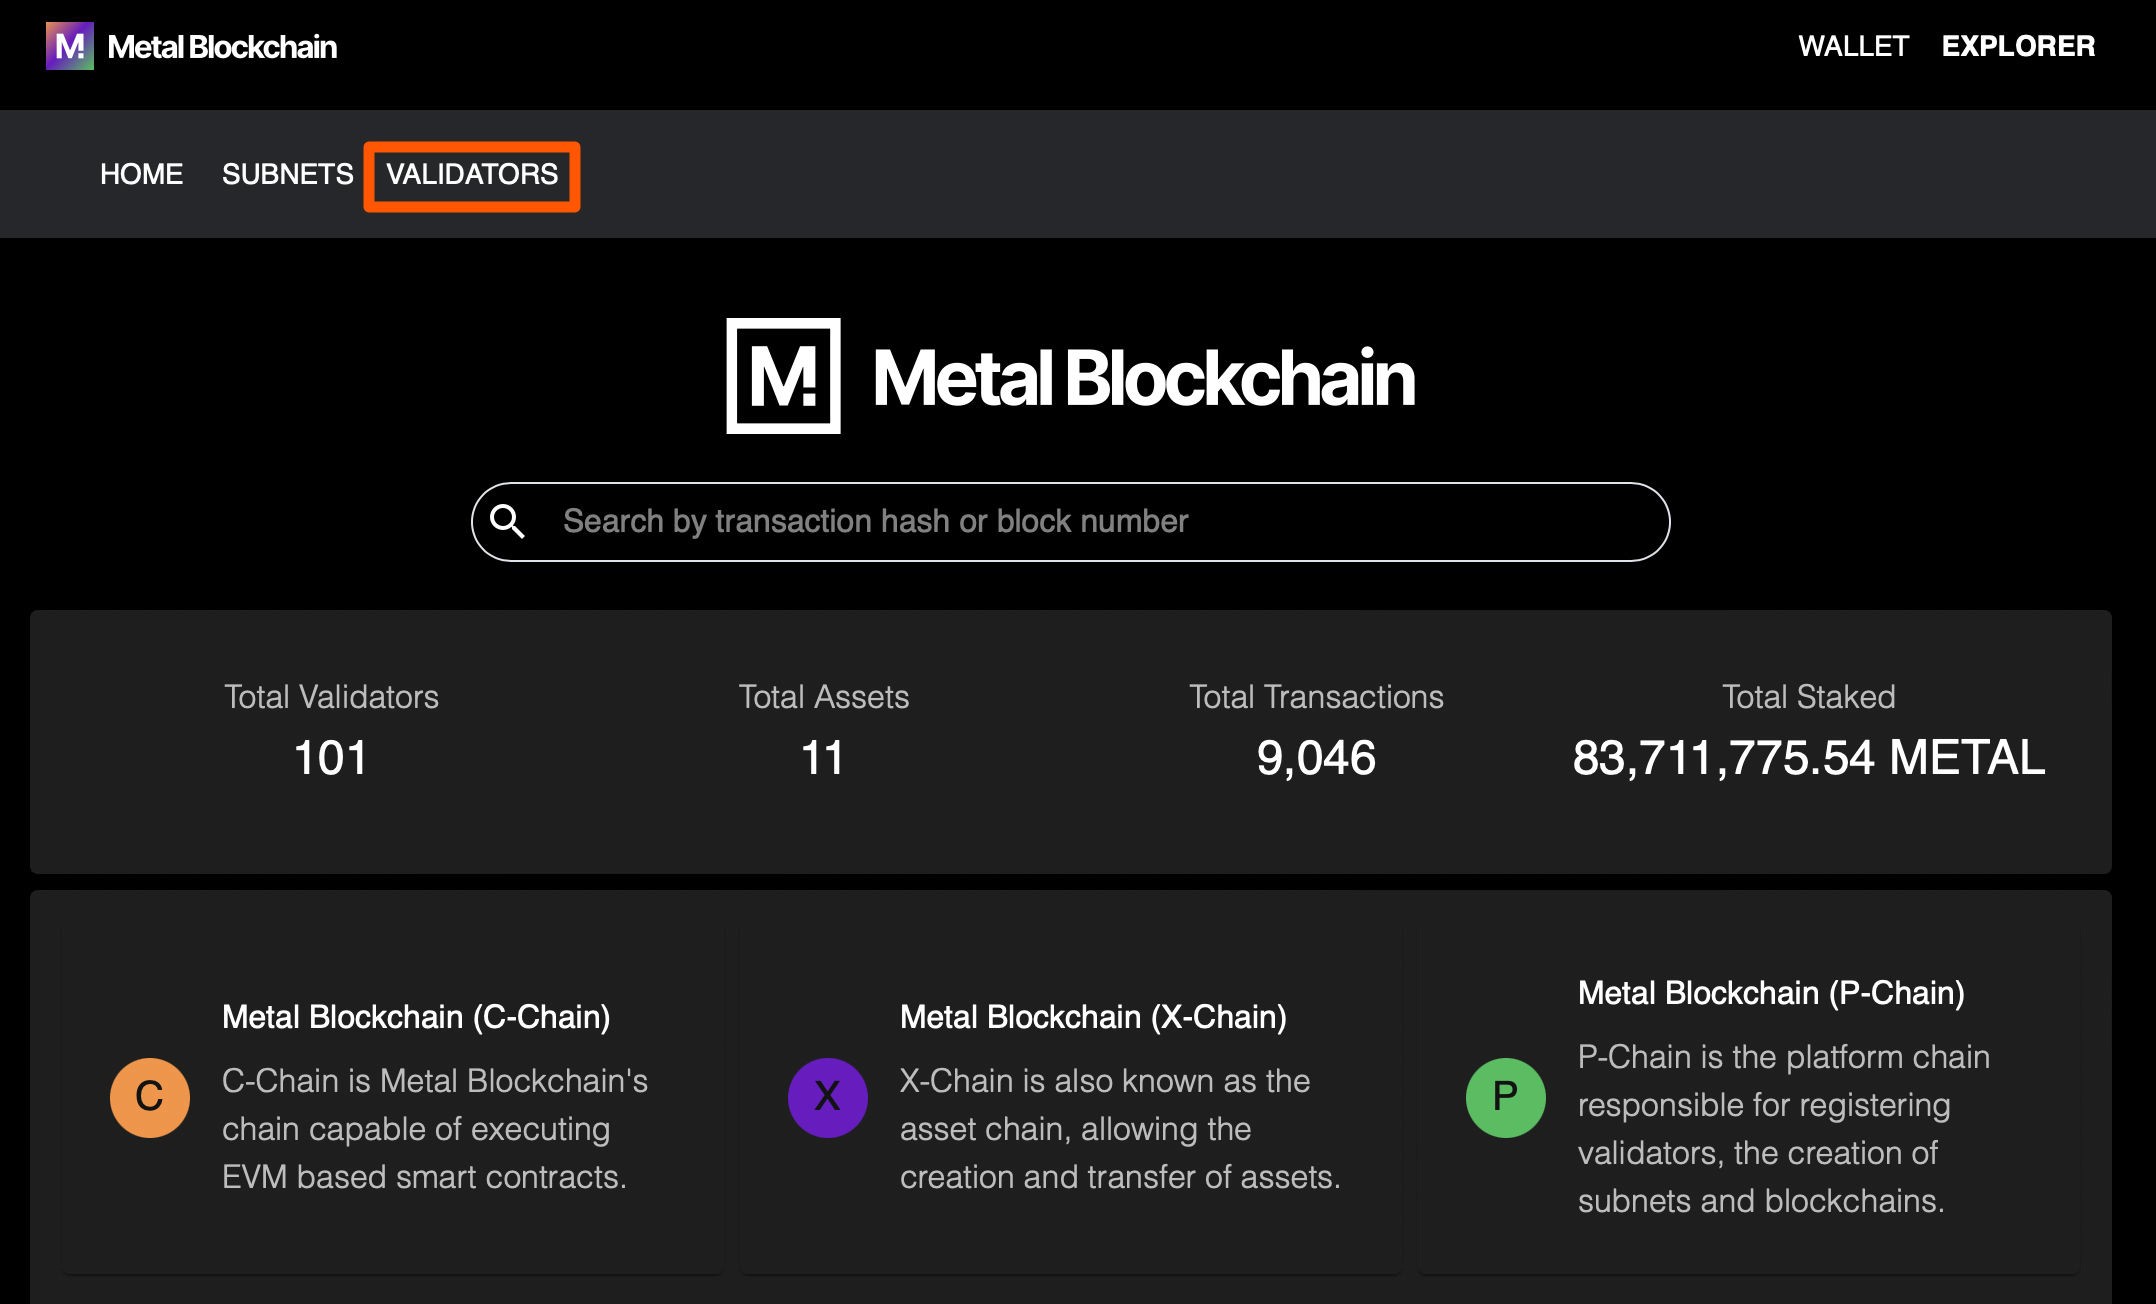
Step 2: Enter your Node-ID in the search bar.
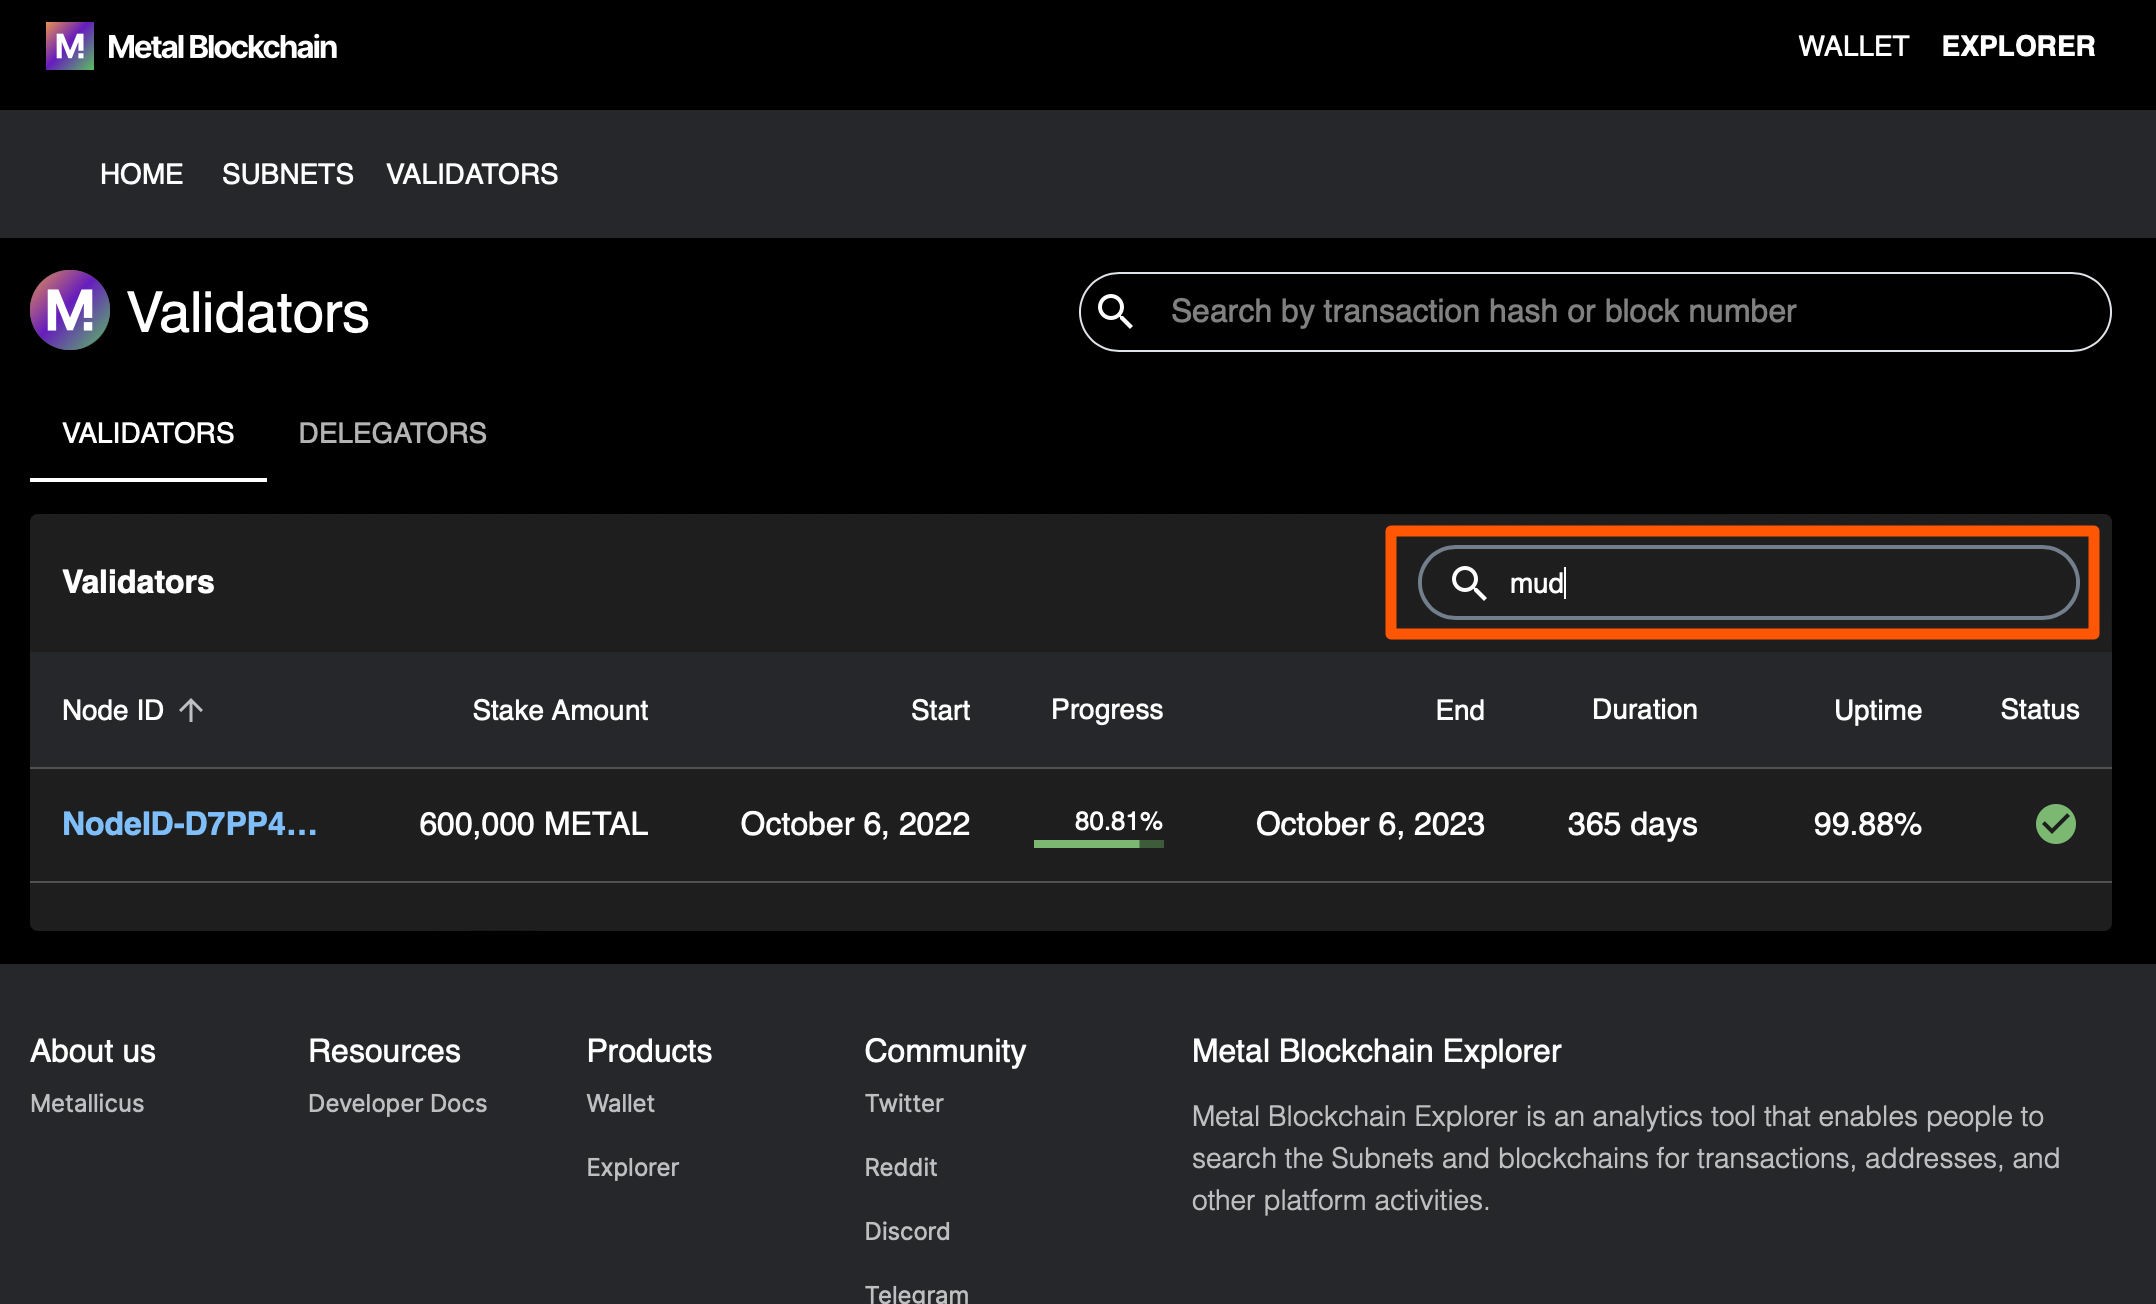
Step 3: Click on your Node-ID link.
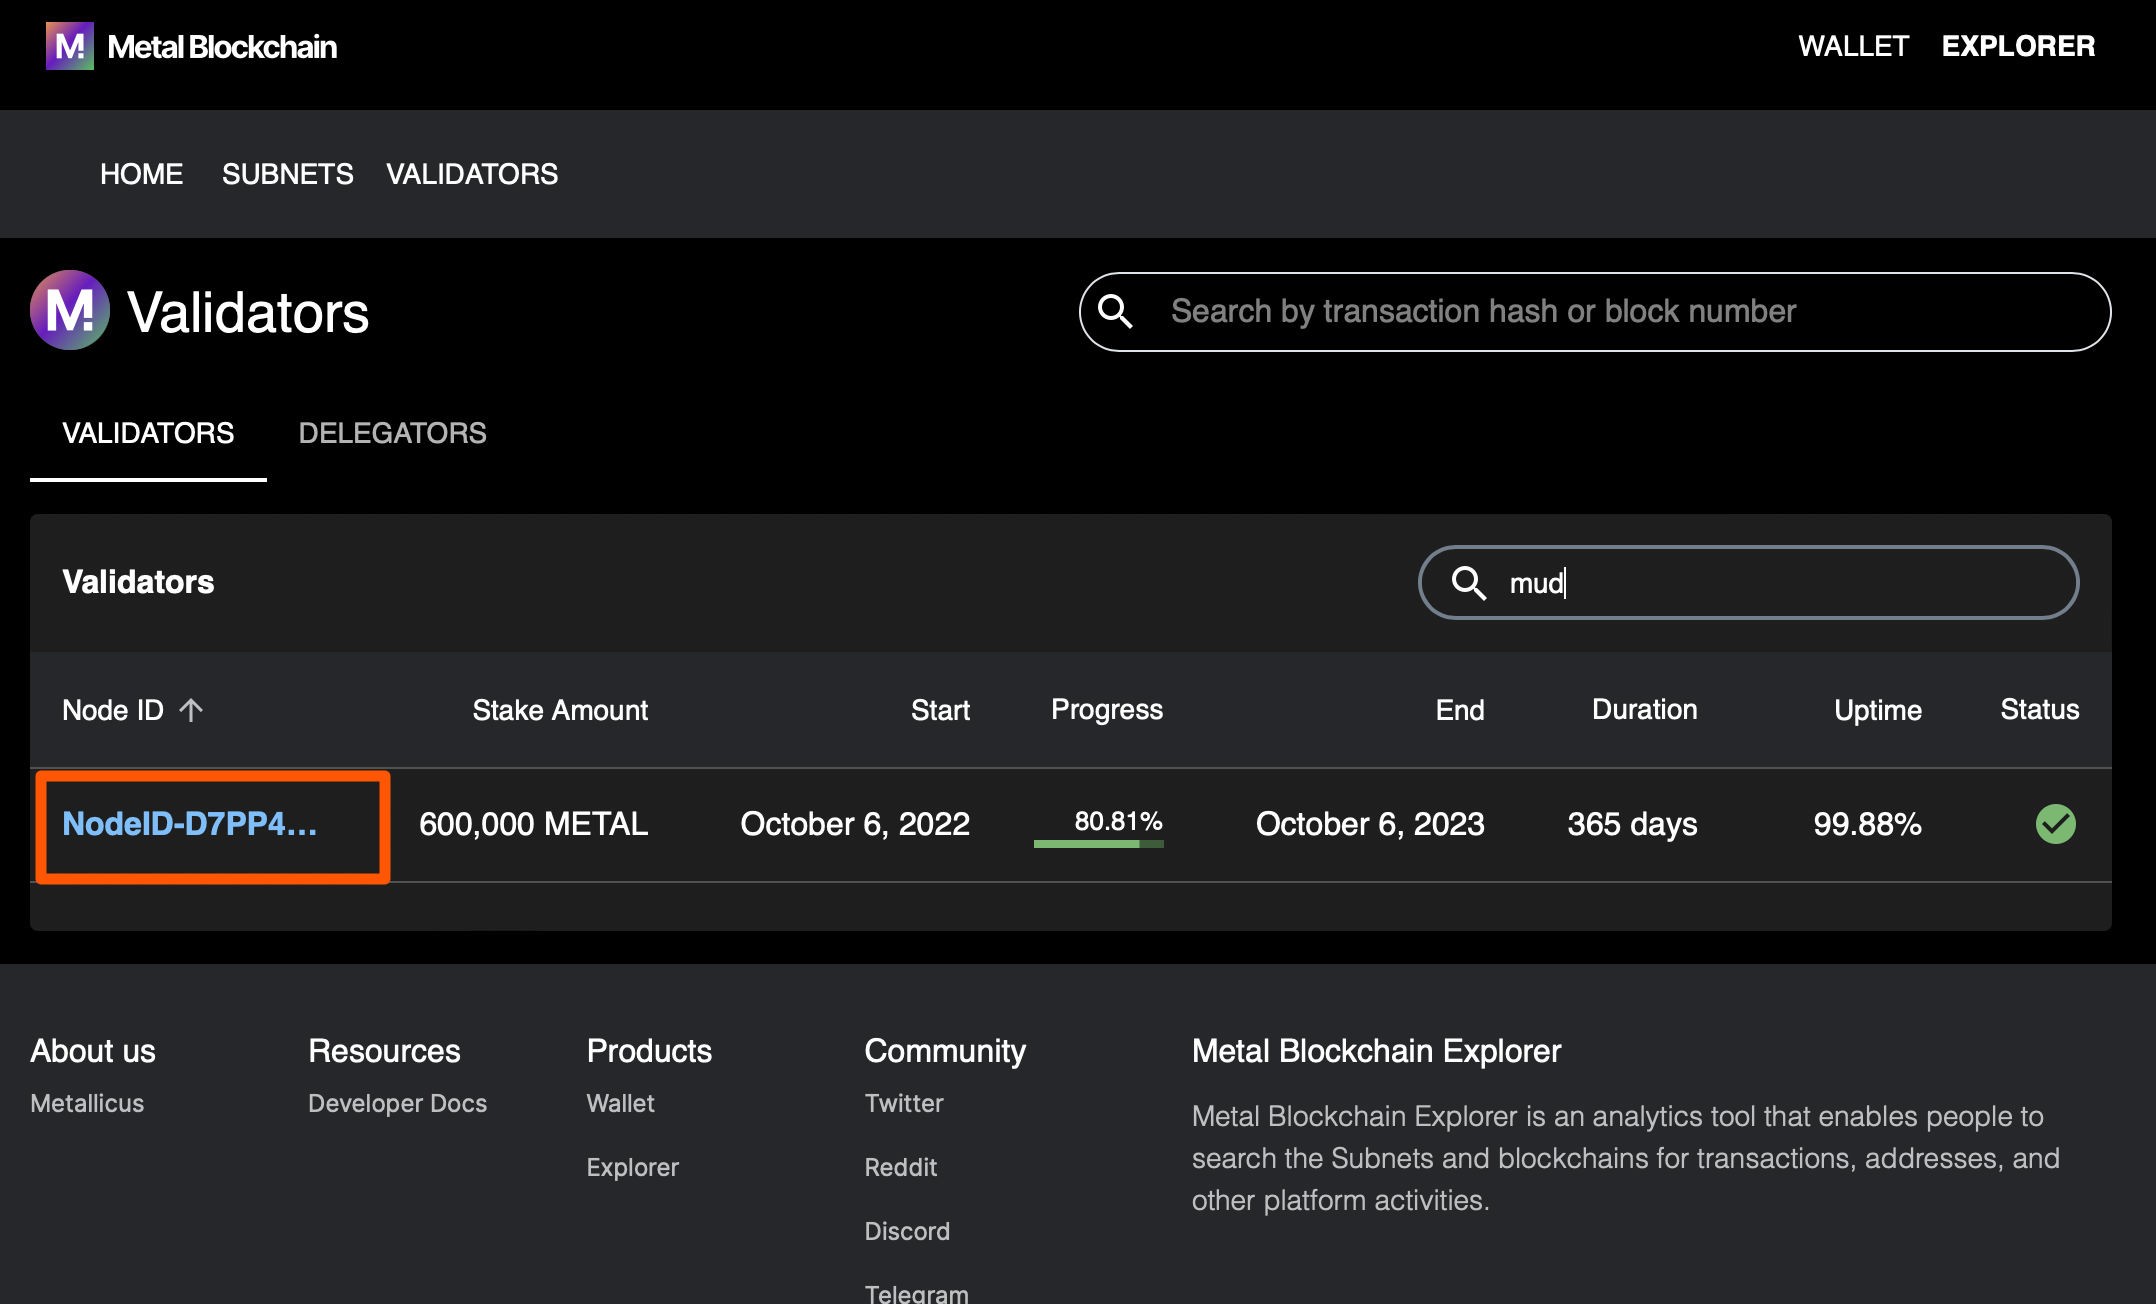
Step 4: Click on the Own this node link.
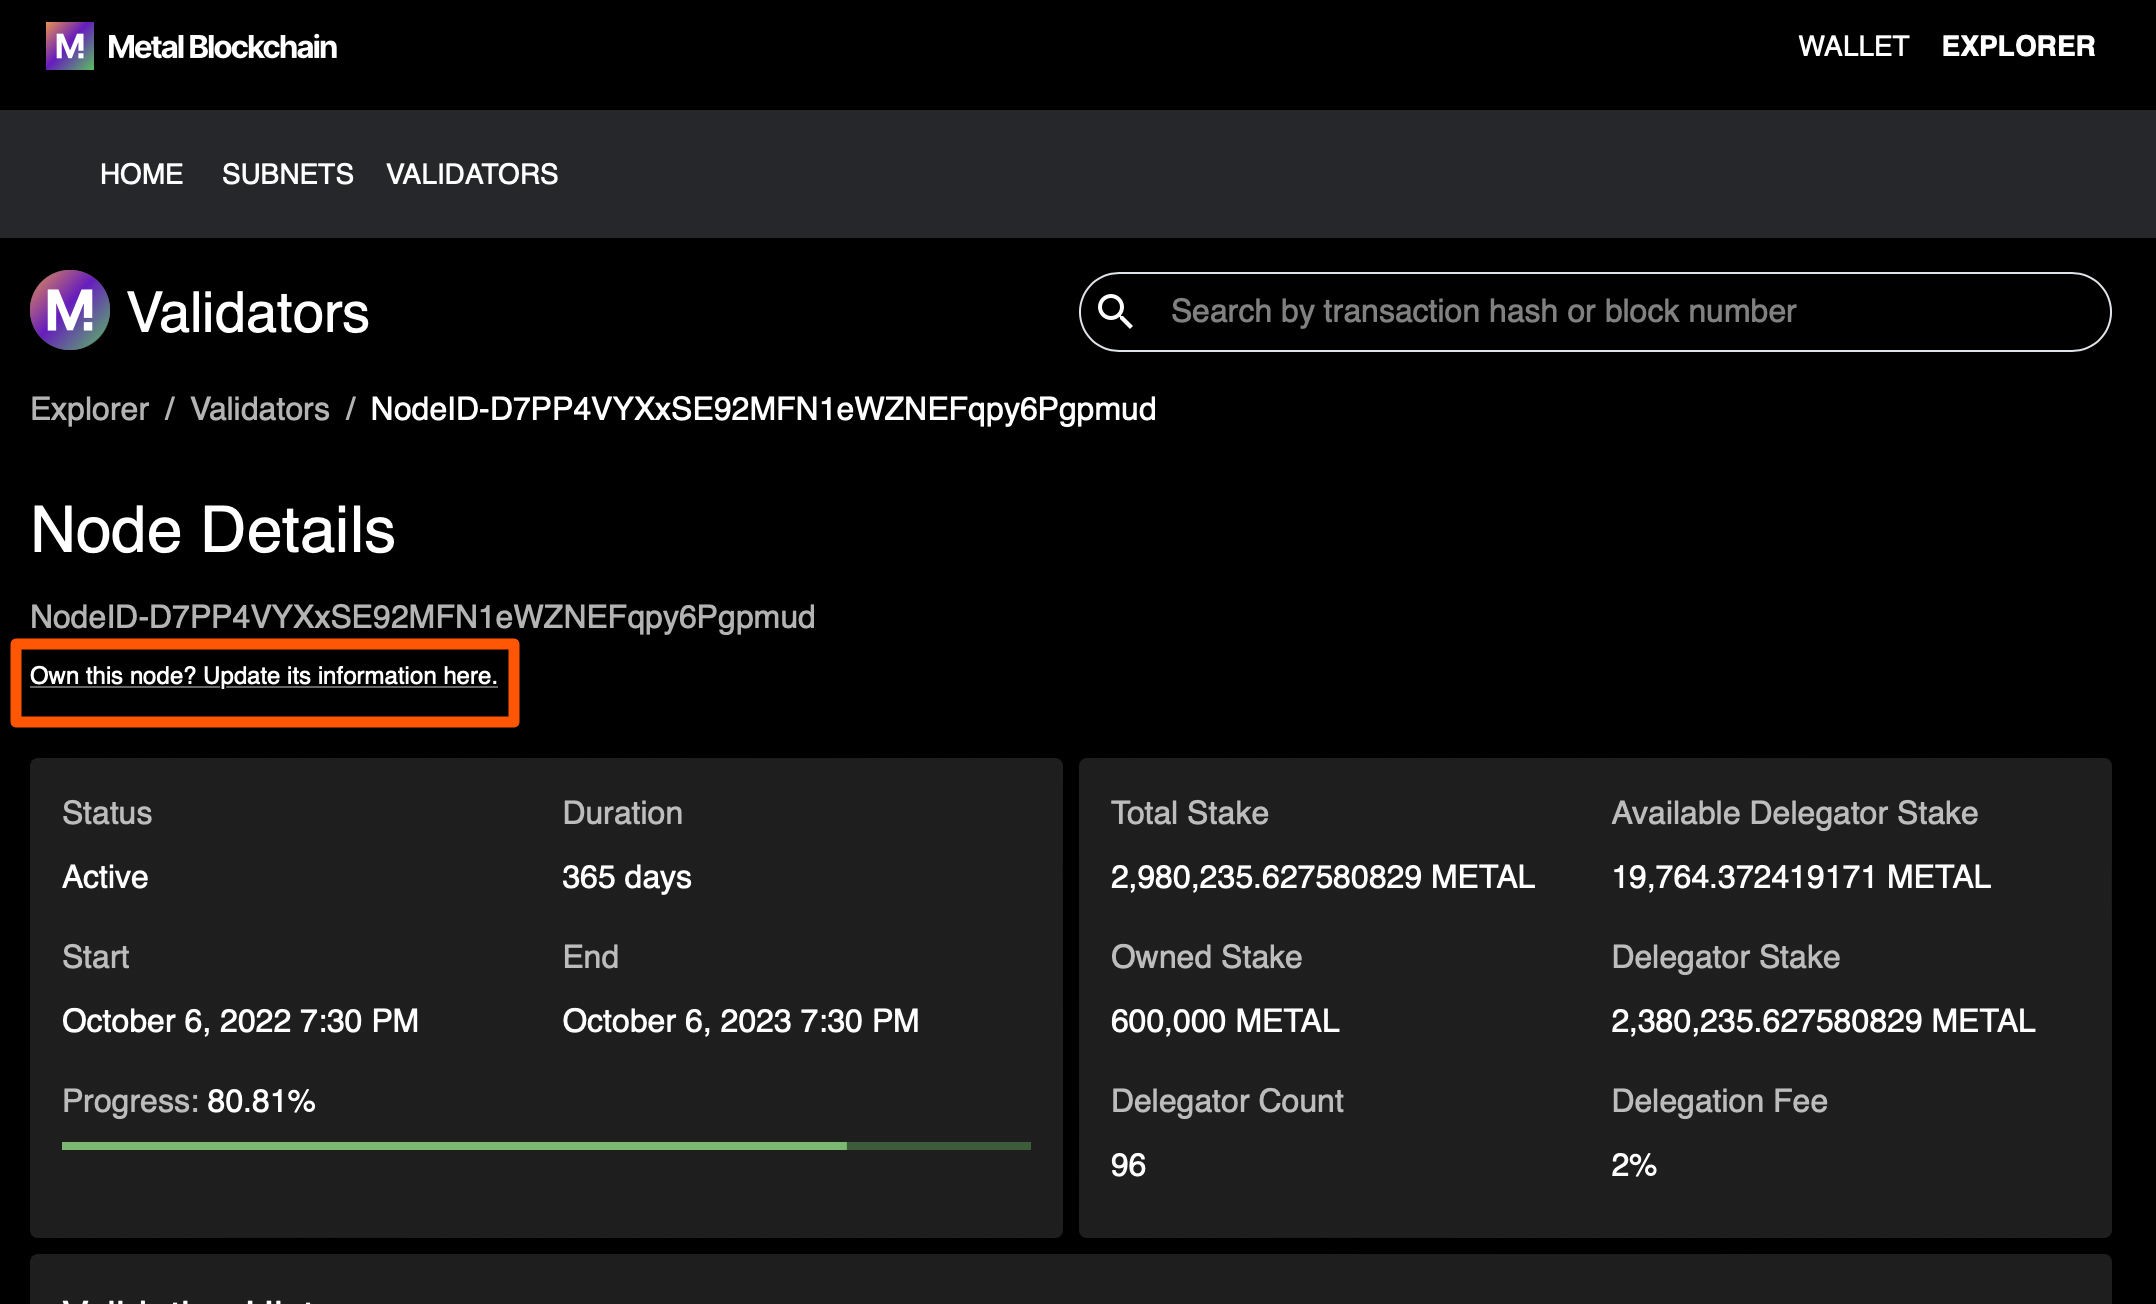
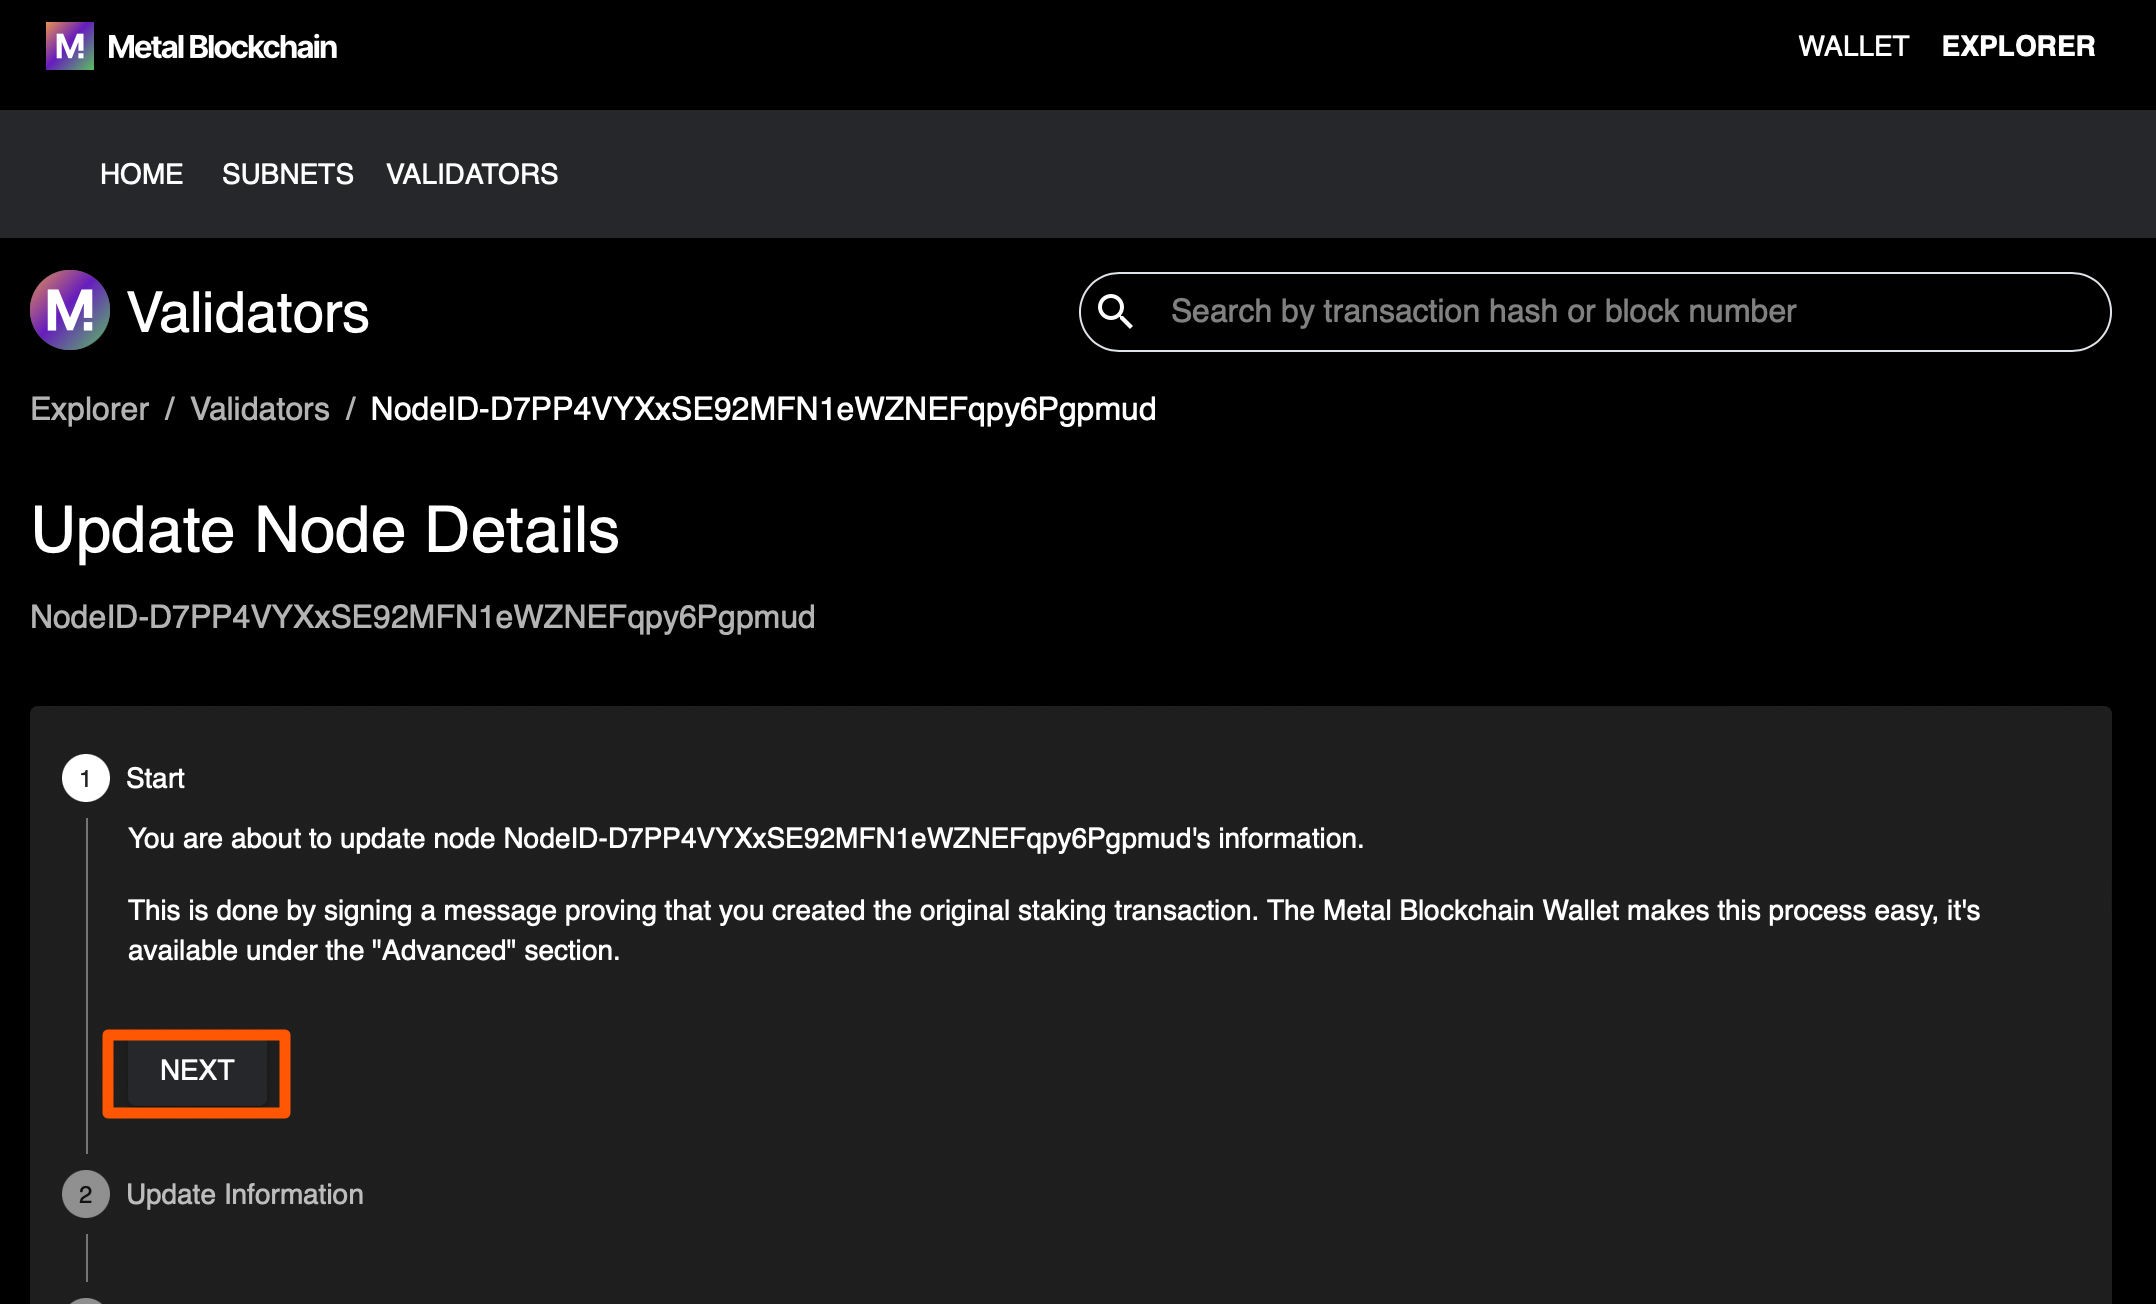
Step 5: Initiate the name update by clicking on the Next button.
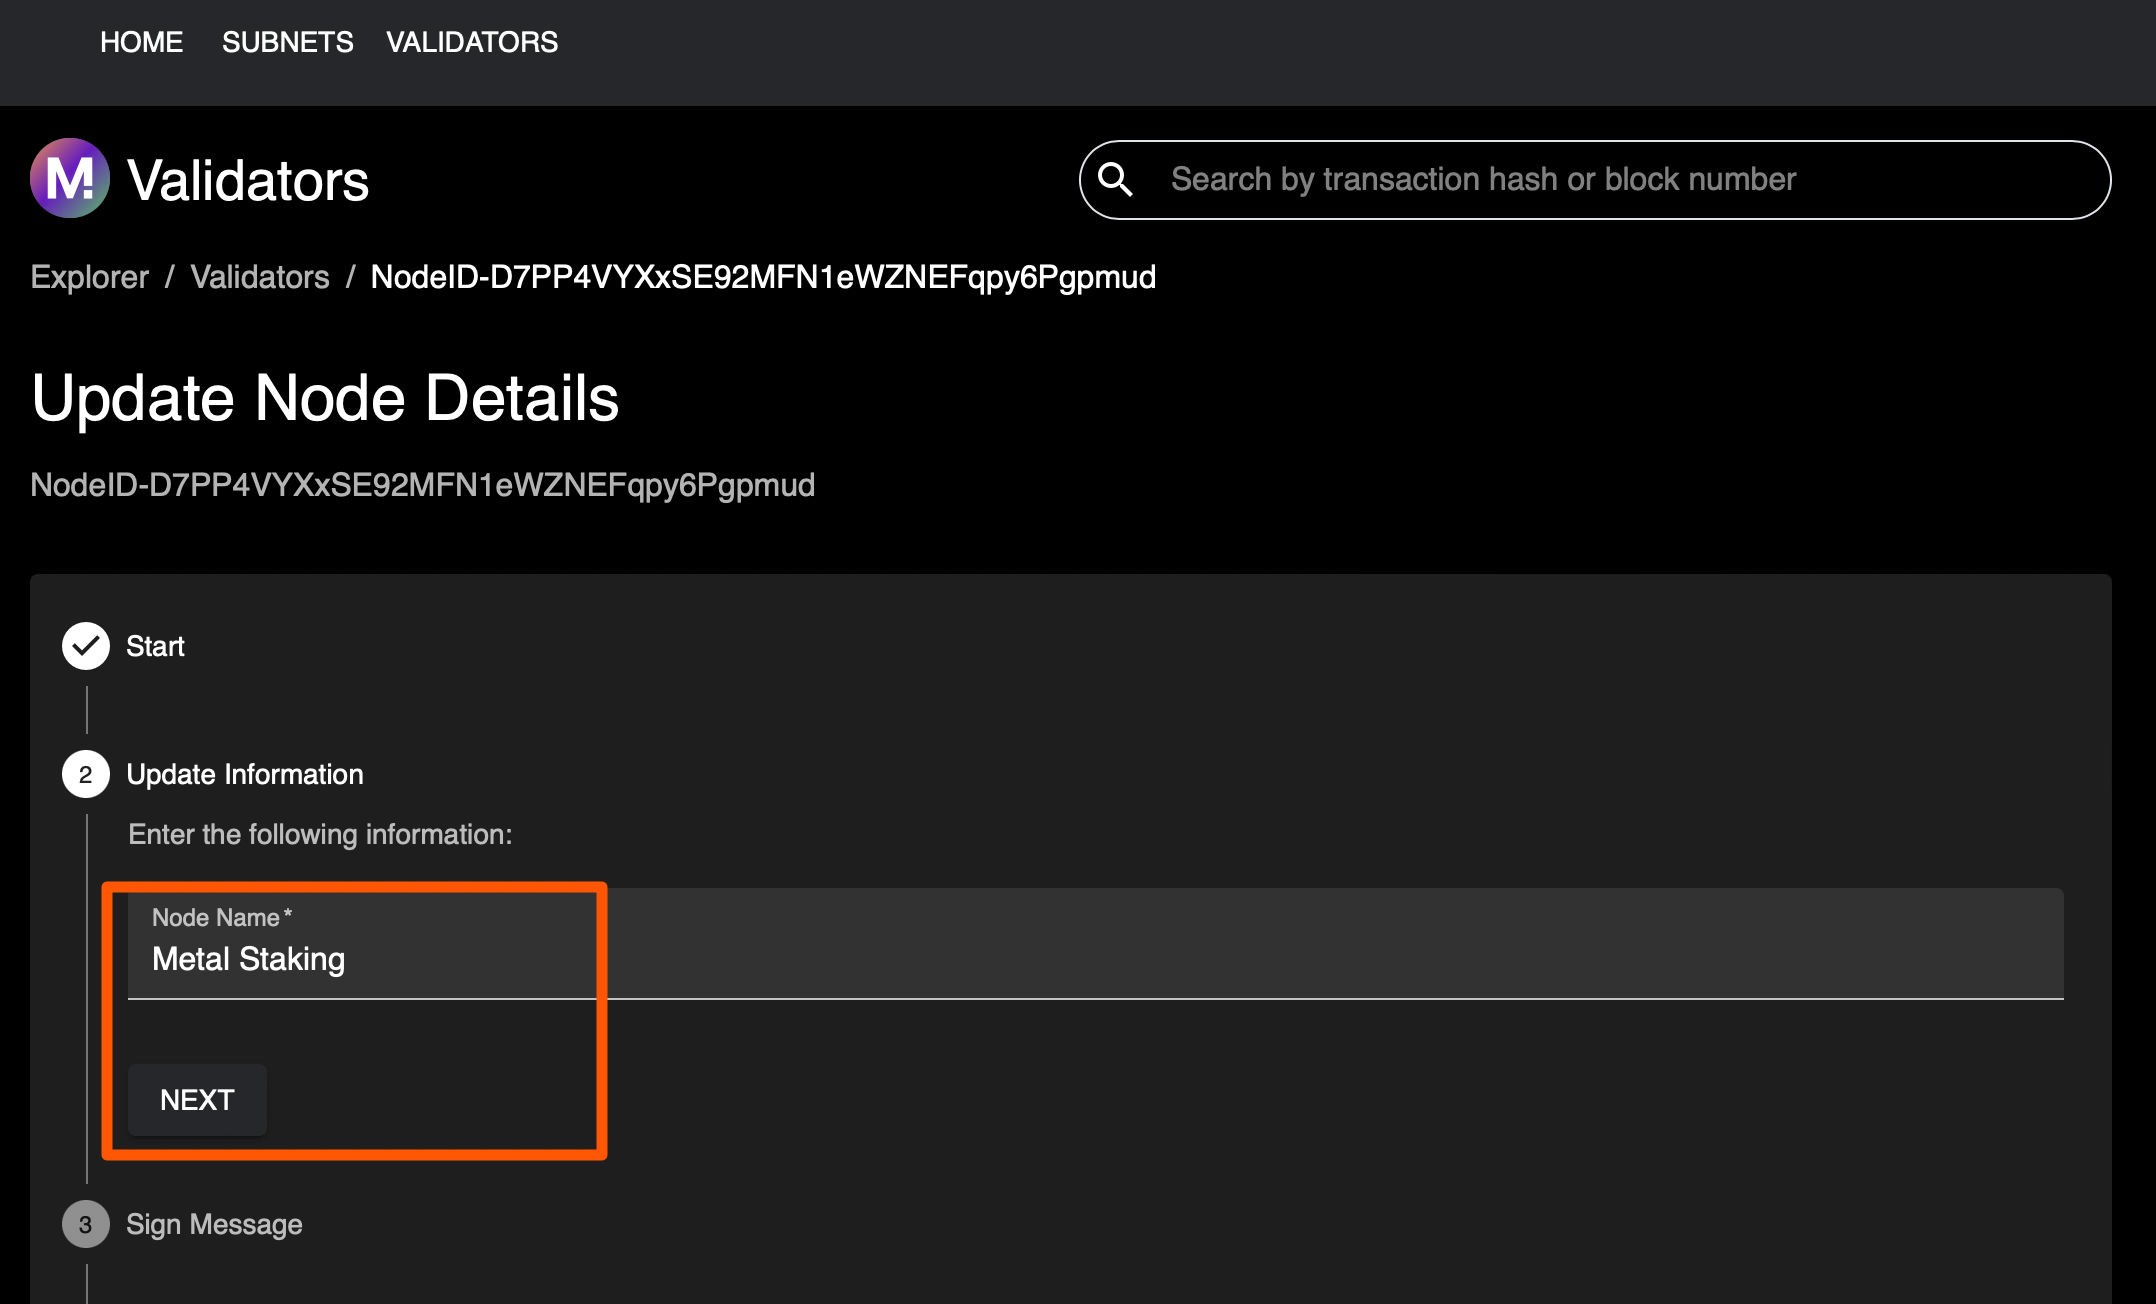
Step 6: Enter your desired node name and click on the Next button.
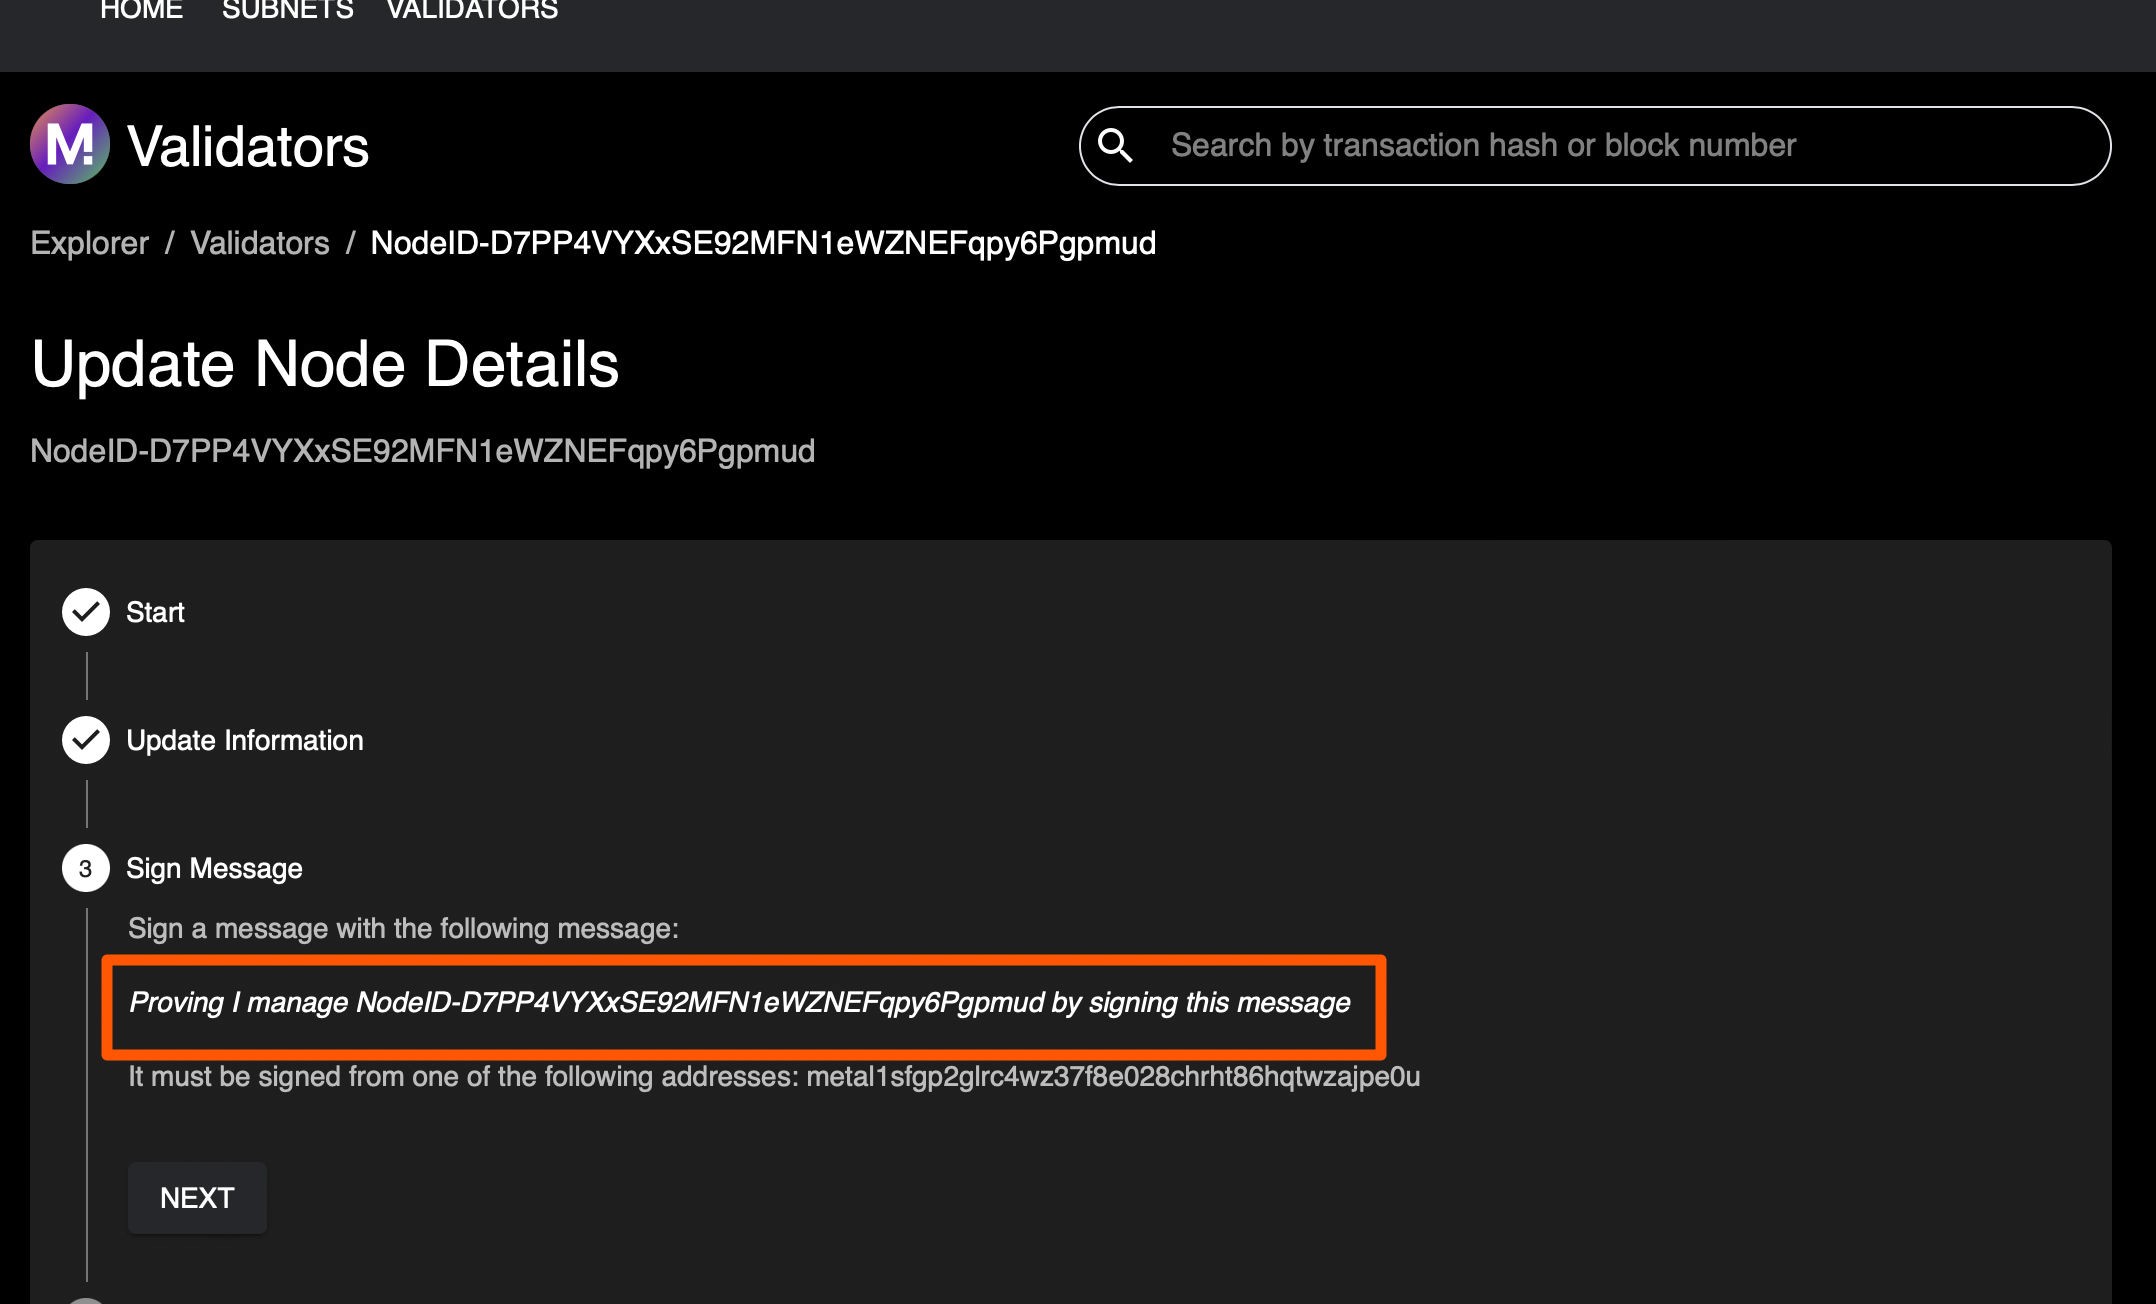
Step 7: Copy the full Proving I manage this Node-ID message.
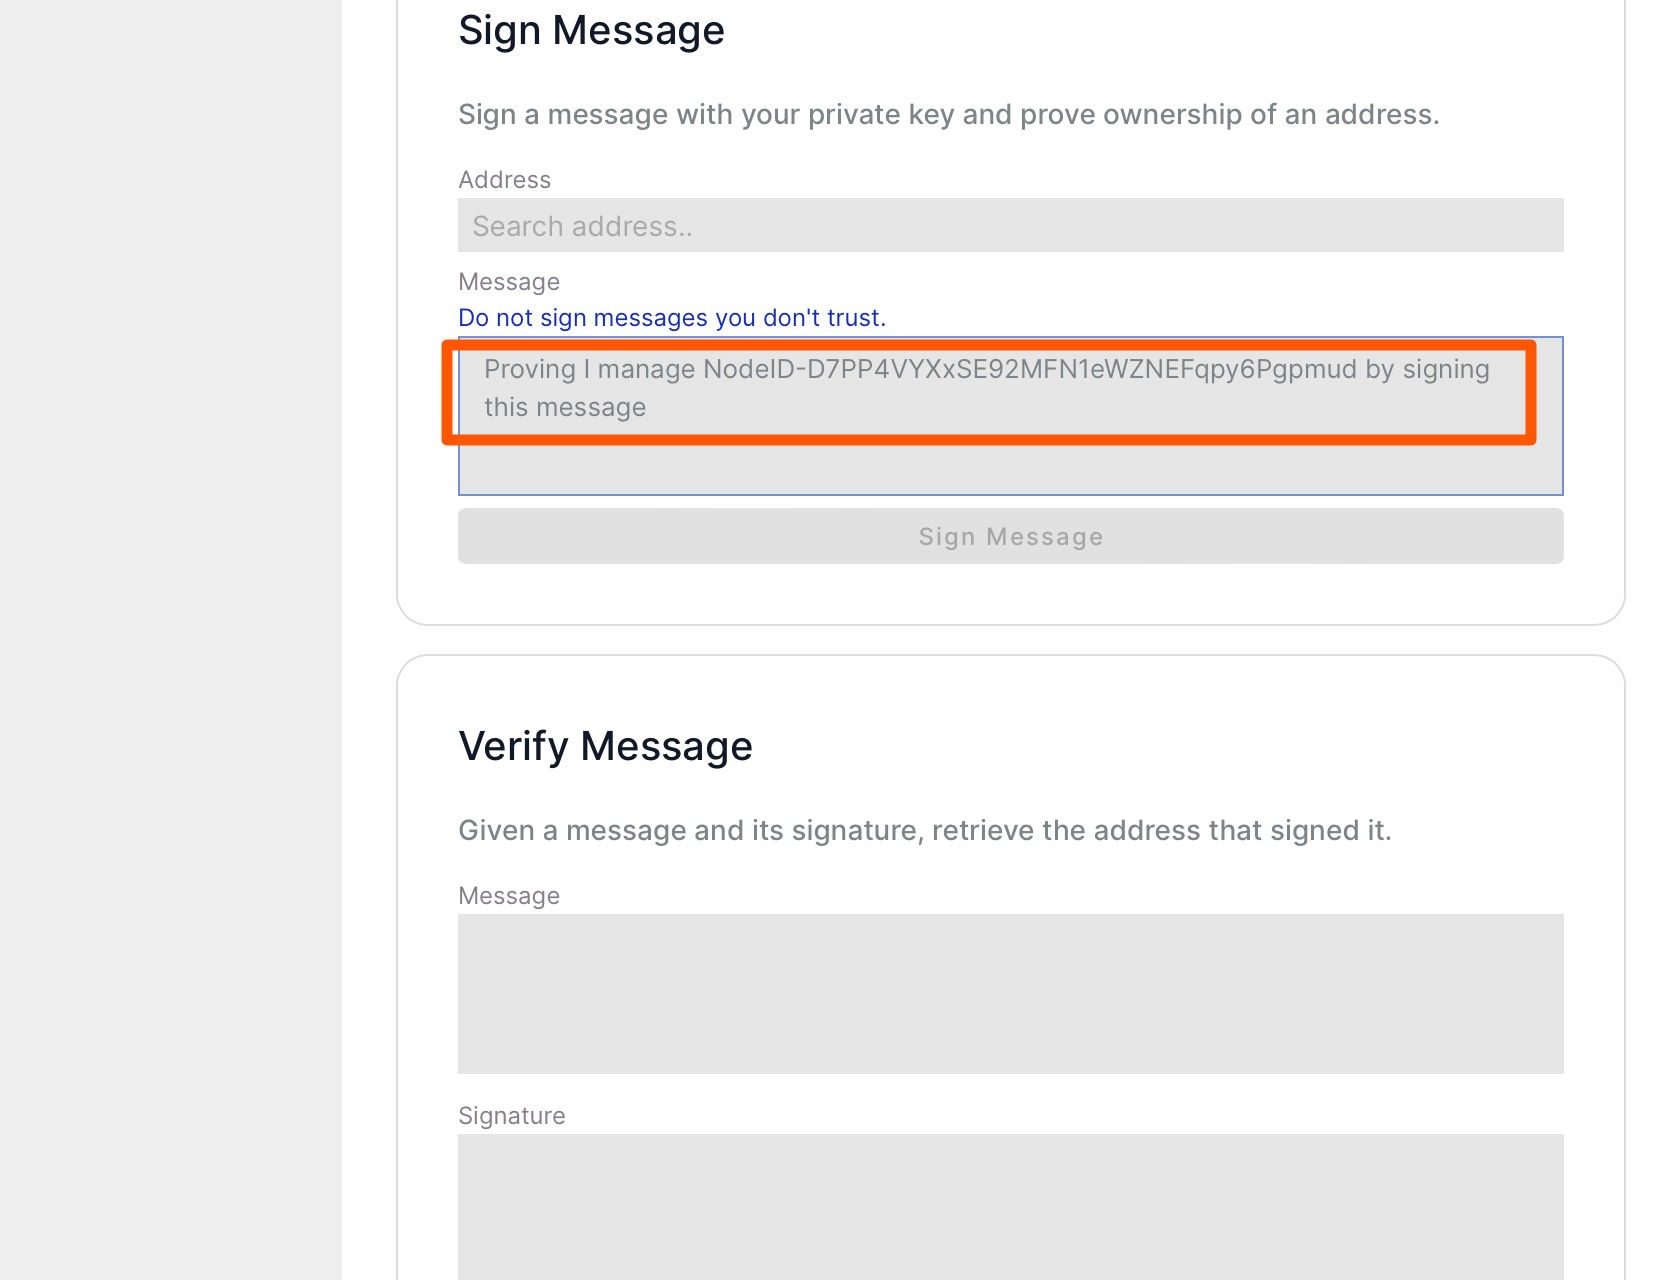
Step 8: Open your Metal Wallet, go the advanced tab and scroll down till you see the Sign Message section and paste the Proving I manage this Node-ID message from the previous step.
Step 9: Go back to the block explorer page and copy the address that is displayed.
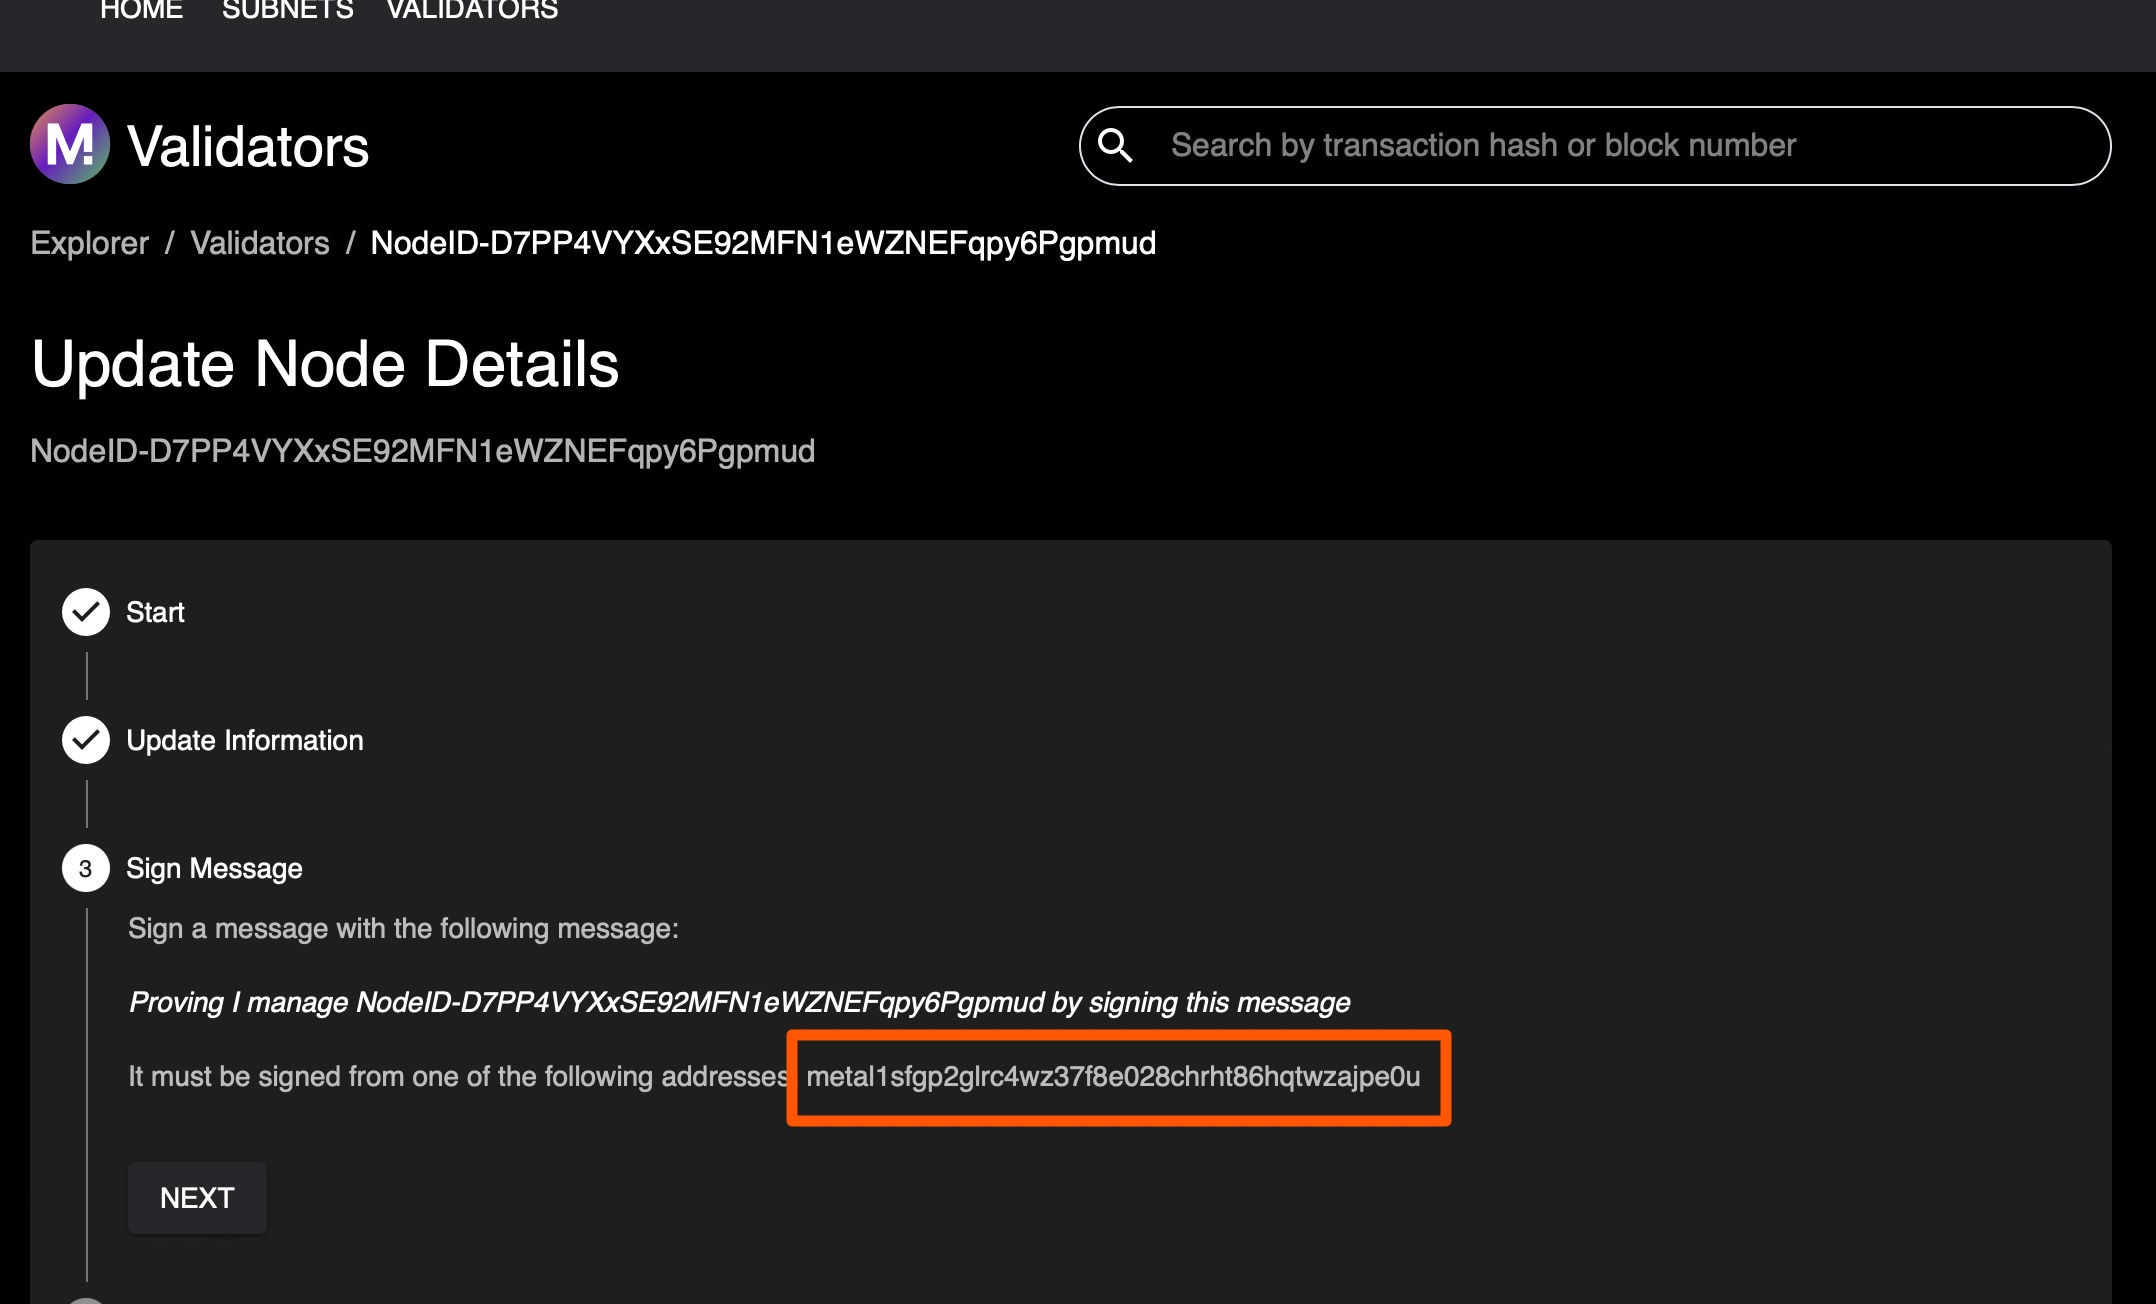
Step 10: Go back to the Metal Wallet and paste the address from the previous step, in the address part. Select the P chain address and click on the Sign button.
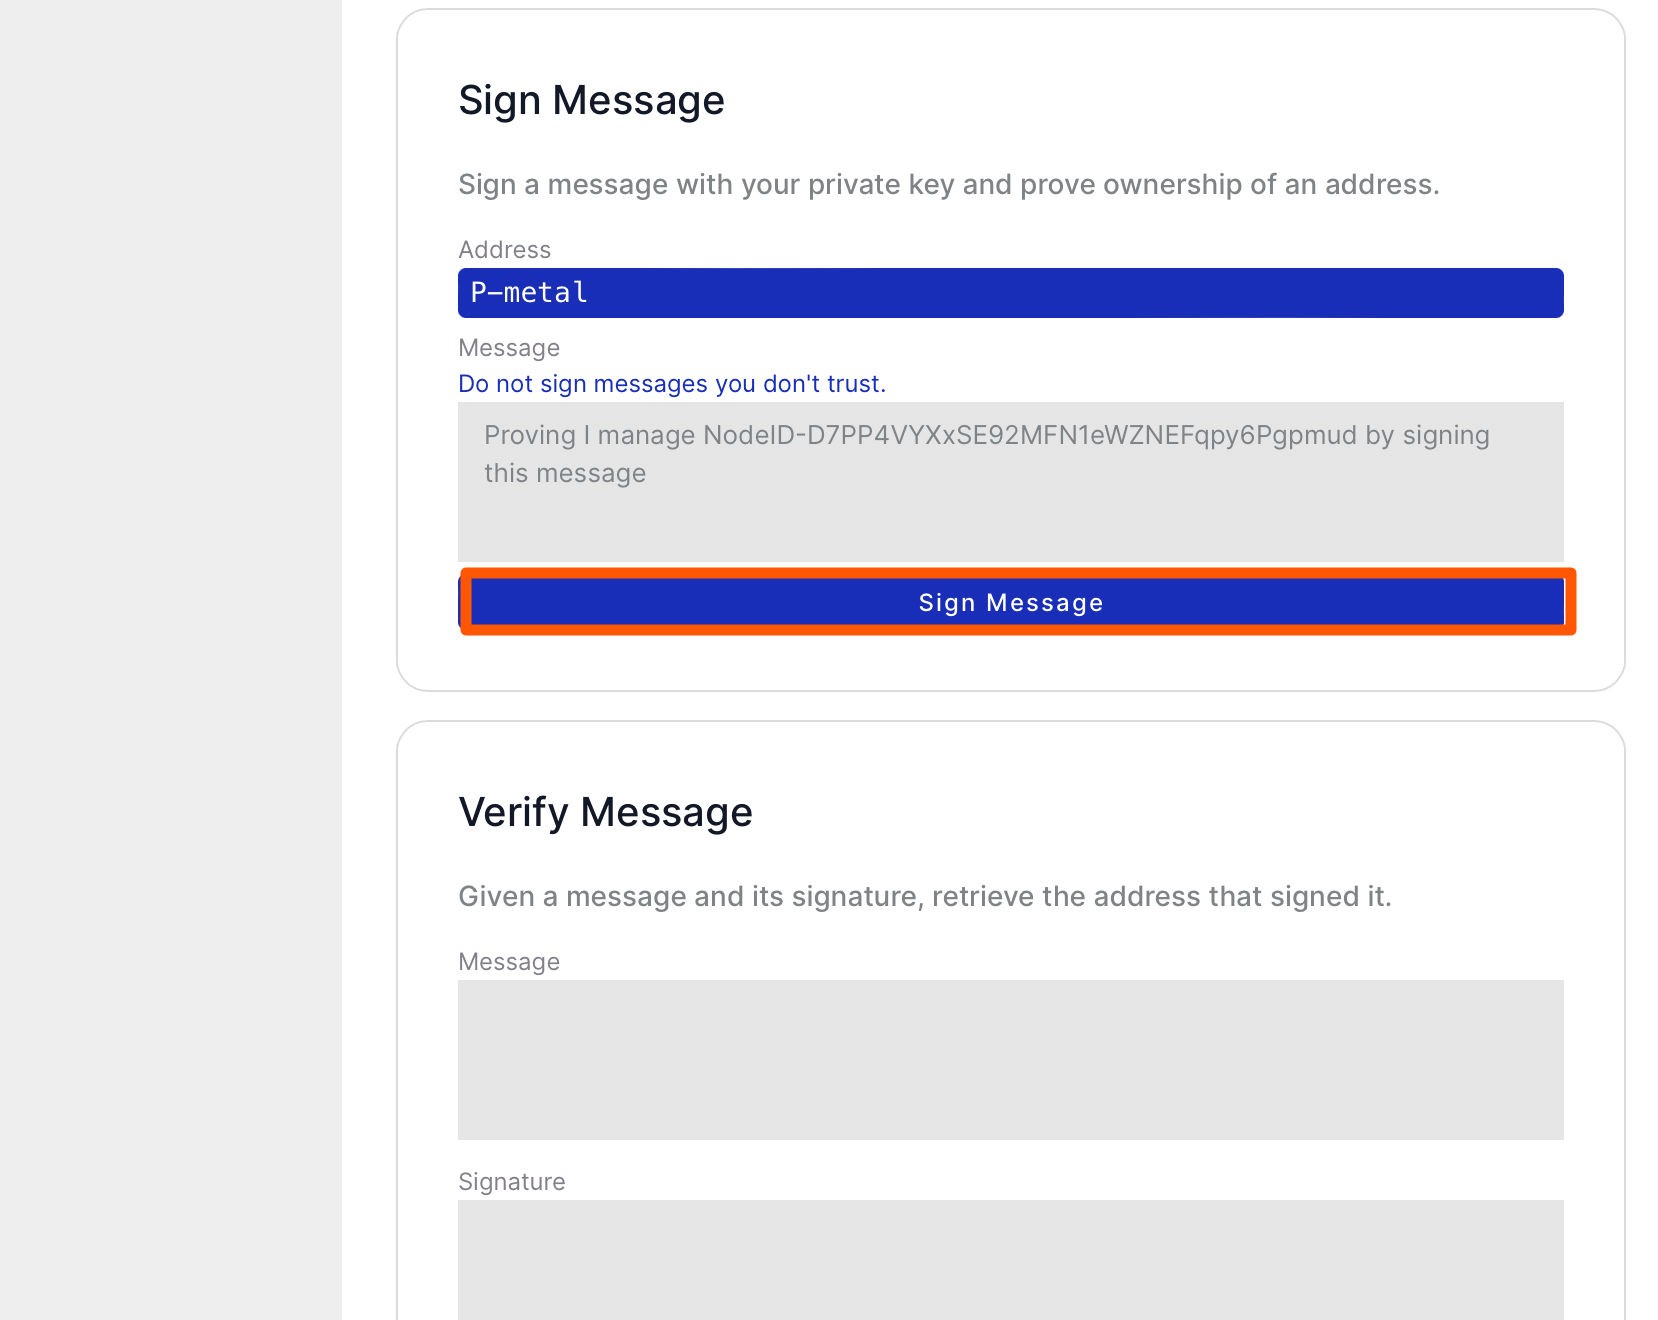
Step 11: You will see the signed message in the wallet, copy it and paste it on the validator page, then click the Next button.
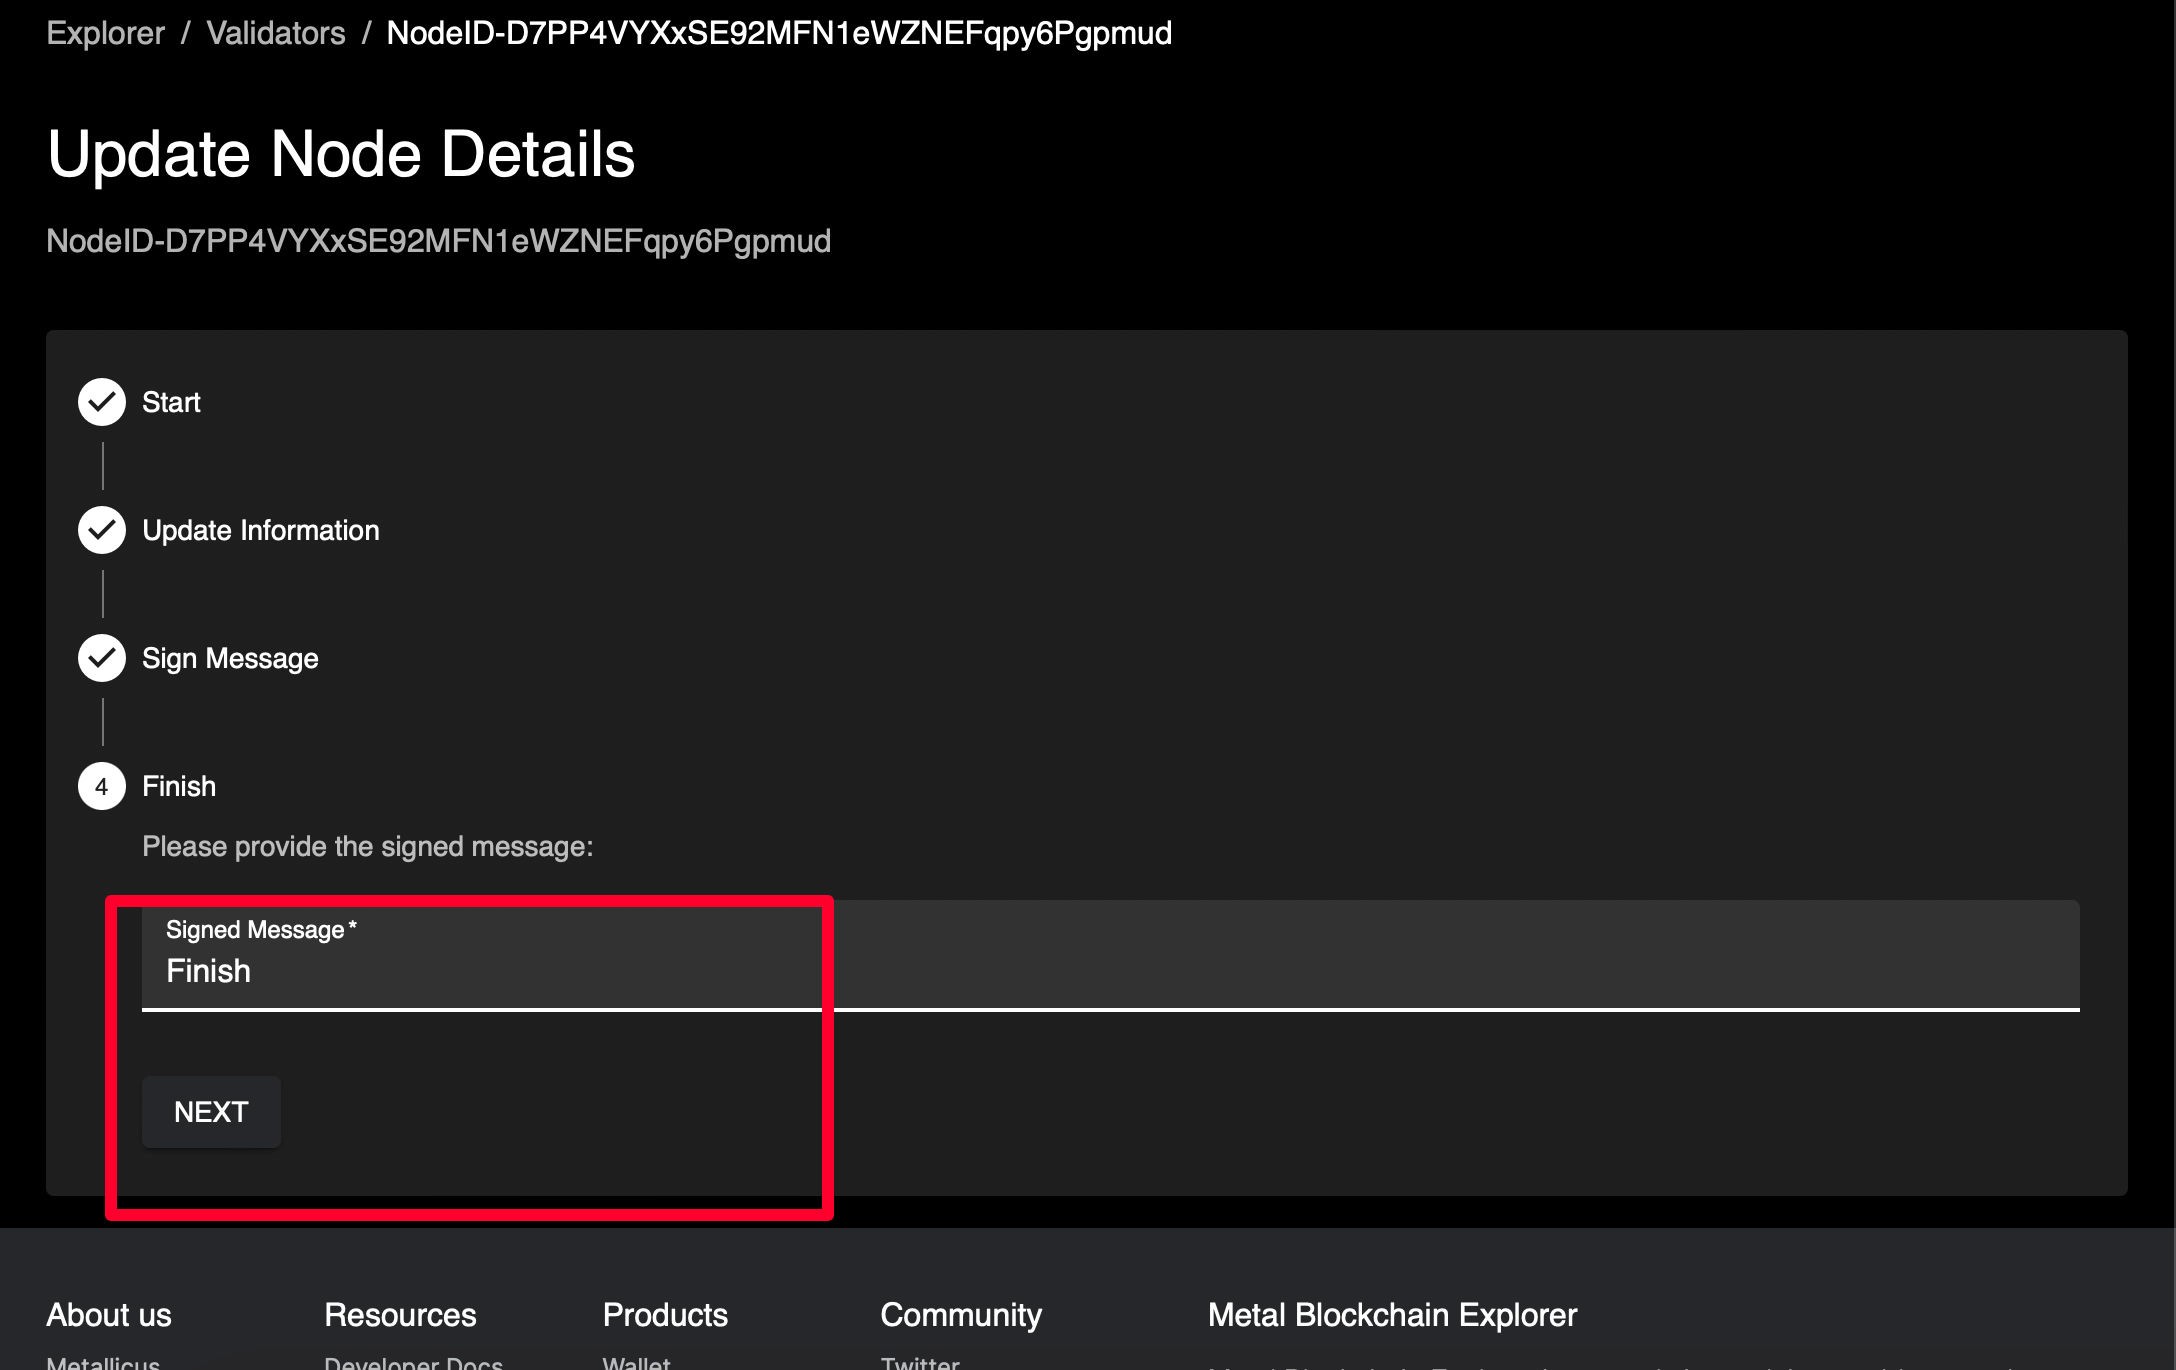
Step 12: Congratulations, your node name has been updated and changes should be reflected shortly!

In this chapter, you’ll learn how to update your node name so that it becomes visible on the Metal Blockchain Explorer and wallets.
Step 1: Explore the validator’s page on the block explorer by clicking here.

Step 2: Enter your Node-ID in the search bar.

Step 3: Click on your Node-ID link.

Step 4: Click on the Own this node link.

Step 5: Initiate the name update by clicking on the Next button.

Step 6: Enter your desired node name and click on the Next button.

Step 7: Copy the full Proving I manage this Node-ID message.

Step 8: Open your Metal Wallet, go the advanced tab and scroll down till you see the Sign Message section and paste the Proving I manage this Node-ID message from the previous step.

Step 9: Go back to the block explorer page and copy the address that is displayed.

Step 10: Go back to the Metal Wallet and paste the address from the previous step, in the address part. Select the P chain address and click on the Sign button.

Step 11: You will see the signed message in the wallet, copy it and paste it on the validator page, then click the Next button.

Step 12: Congratulations, your node name has been updated and changes should be reflected shortly!


